Steps to perform a new Umbraco 8 install with Microsoft Azure
A technical article for developers learning or using Umbraco 8 and Azure services.
I-finity perform a lot of their Website Development in Umbraco, this article will detial the steps that we follow when beginning a new Umbraco Project. These steps, when done correctly, will aid the development process and ensure it flows smoothly from start to finish. This article can be used a reference for our team and for others needing guidance on how to begin. Our process involves combining an Umbraco 8 CMS with tools and services provided by Microsoft Azure to manage websites.
Azure setup
When developing and maintaining websites, there are many processes that are important to follow and perform in order to have an effective development cycle. Microsoft Azure allows us to perform many of these processes using their services. Book a review of your Azure setup today.
1: Storage account (Blob Storage)
Often media and files need to be stored and cached somewhere easily and quickly accessible so the website can load and render this information to the front end of the website in a timely manner. To allow this to happen, we use Blob Storage attached to an individual storage account for each different website we manage. This allows any image or files that are uploaded in Umbraco to be stored somewhere easily and quickly accessible. This speeds up the loading of the website and improves the user experience when the product is live. Blob storage is used when you have lots of unstructured data to store such as images but there are other types of storage types you can use attached to a storage account such as General Purpose, BlockBlob and File Storage.
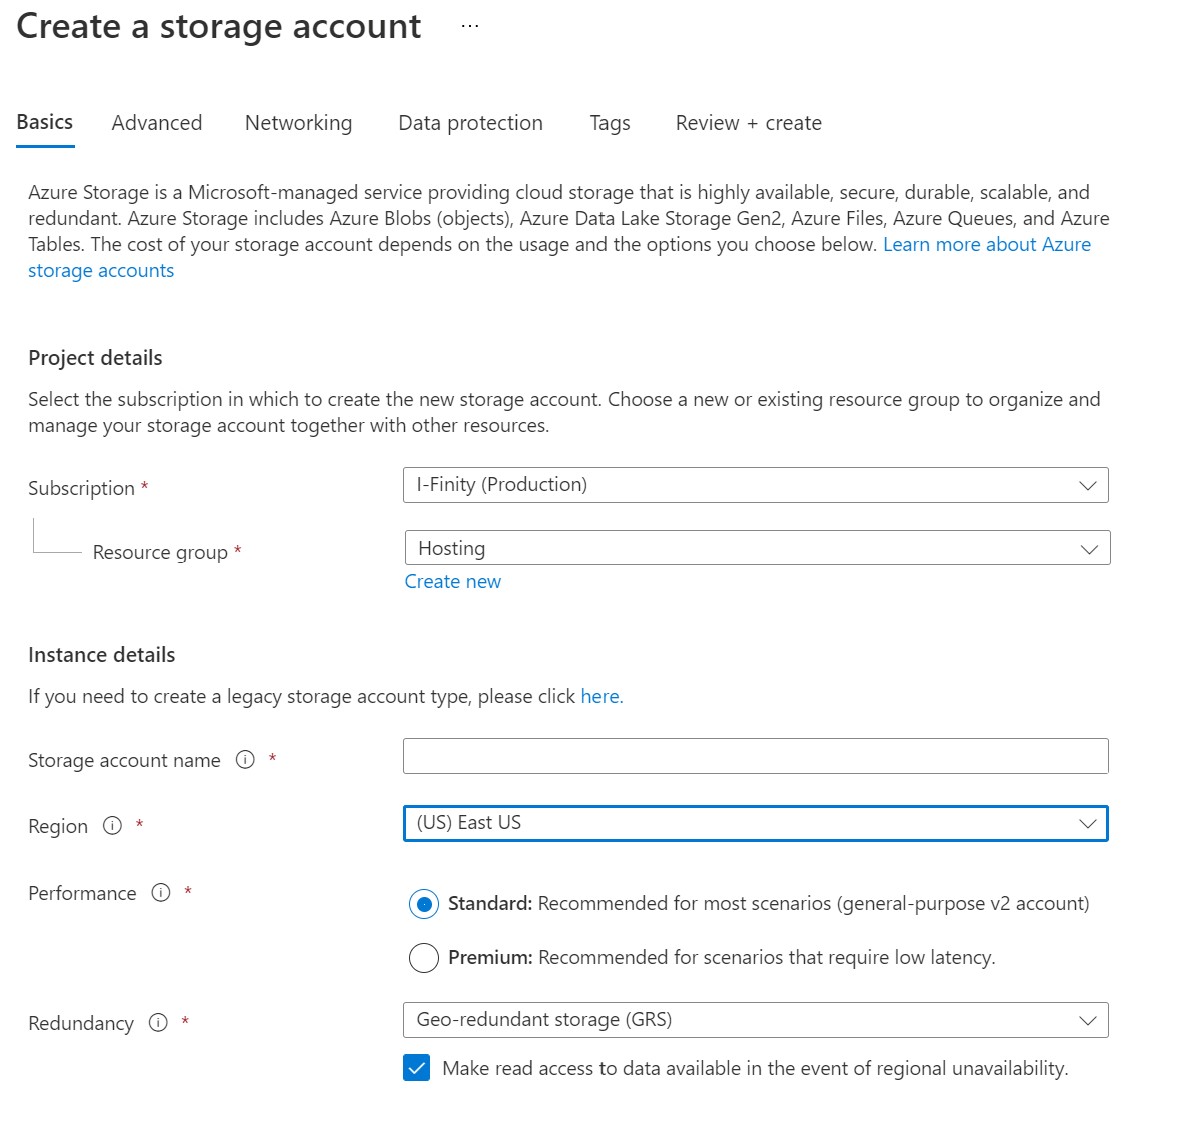
2: Hosting environments
An example of this is the need to have different environments to allow for testing of development work, on a non-local machine. This allows End-users or other developers an easy way to check and test the development work, as well as enabling only the code that has passed these checks to be used on the live site.
Microsoft Azure provides an App Service in which we can create Hosting Environments to use as Staging and Production environments. You can have up to 10 Web, Mobile or API apps on the App Service for free, with a Microsoft Azure Free Account. We believe that it is important for the development cycle for testing to be performed thoroughly and extensively to ensure the product performs as expected. Creating different environments in the App Service allows I-Finity to do this and helps the development process to flow onto the next step.
3: Database (Add to elastic pool)
We also make use of a database with each website we create/customer we manage, this is so that we can store and request data specific to each website/customer. As we manage several websites which have varying and unpredictable usage patterns. We use a Database with an Elastic Pool to allow all of our databases to share the same resources which we then control. This allows more for more flexibility when databases’ needs and usage increase, while also keeping the costs for our company down.
So, at this point you should have set up an App Service that has one or two hosting environments for staging and production. We have added a new database to our elastic pool of databases, and a storage account using blob storage to save the media and cache needed to quickly load and render the website. Remember to make a note of the details of all of these individual services as you will need them later when setting up the configuration of the Project.
Visual Studio setup
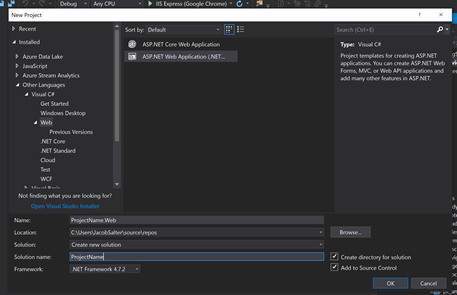
Firstly, we create the Solution and Project in Visual Studio for all the code to be stored in. We keep ours consistent with a naming convention so our Solutions are called ‘ProjectName’ and for the project version we add ‘.Web’. Go to File > New Project.

We then pick an ASP.NET Web Application. Double check that in the "Framework" dropdown you've selected .NET Framework 4.7.2 and ensure you select an empty project. To create the solution, we then select ‘Create new Solution’ and input the name ProjectName. This is also where you input the name of the project, which we call ProjectName.Web.
This is where you should check that you have created a c# project, you can tell this by the project file ending with ‘.csproj’
Umbraco installation
Umbraco is a Content Management System; this means that it is a way to edit and manage the front end of your website. It holds all of the information about the pages and provides an easy way to upload and edit media files. It also allows content editors to edit content without having access to changing the different components available for use on the website.
While also allowing developers to access templates that can be edited and created both in the Umbraco back end system as well as in Visual Studio. But to be able to use Visual Studio, you need to complete an Umbraco installation in the newly created project.
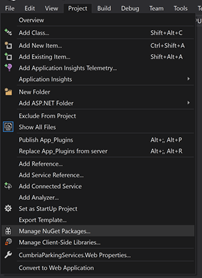
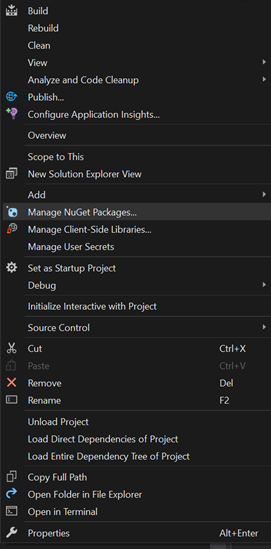
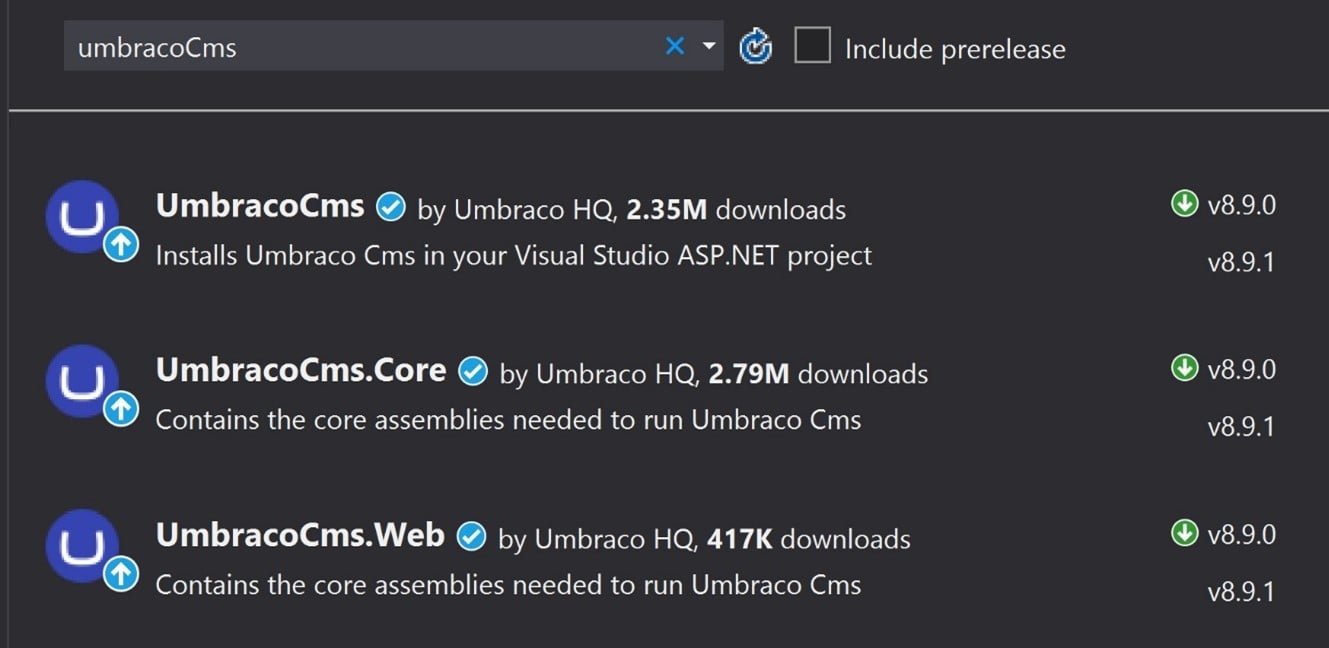
You can find the NuGet Package manager by going to ‘Project’ and selecting ‘Manage NuGet Packages…’ or right click on project and select Manage NuGet Packages.
We then search for UmbracoCms and download the package of the same name.
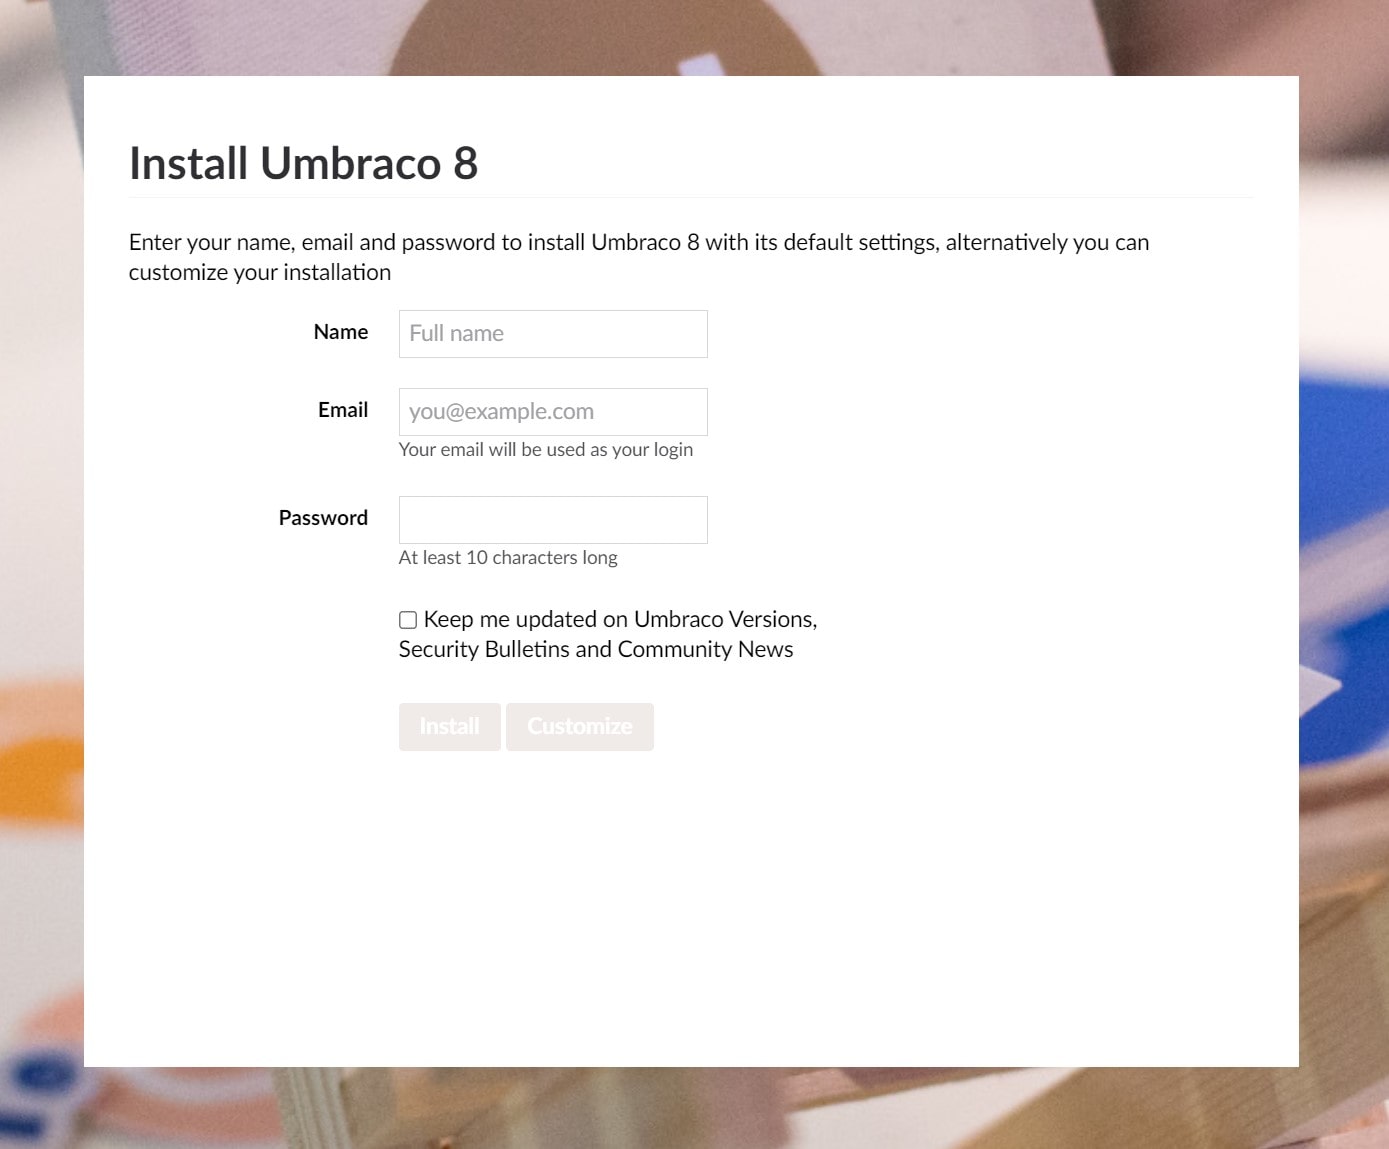
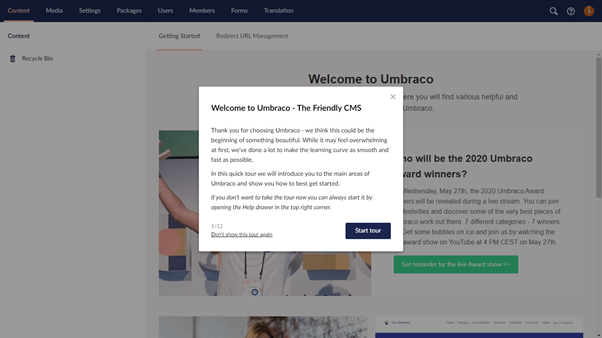
You should then run the site using Ctrl + F5 and follow the installation Wizard shown by image to the left.
Step One
It is important to select Customize to enable us to customize the installation, we do this so we can link it with the database set up in Azure, this will allow the website to run smoothly and quickly.
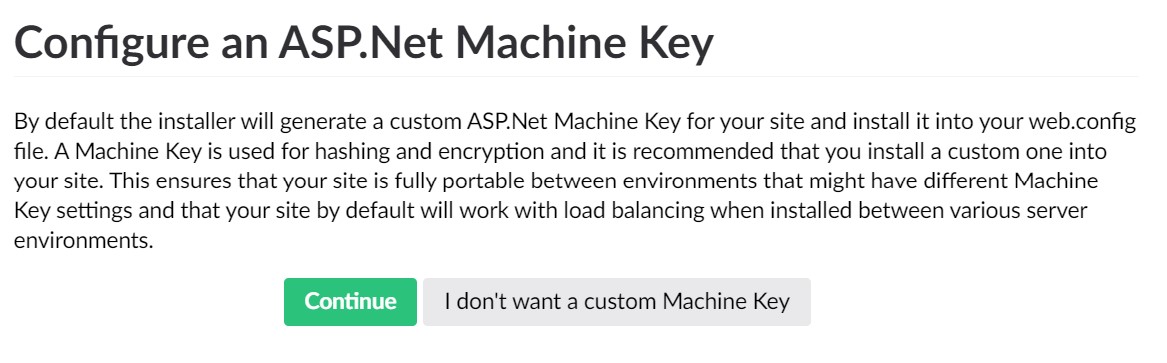
Step two
You should select ‘Continue’ to get a custom Machine Key – we recommend that you make a note of this. We need a custom machine key because without one, you would not be able to use your project on multiple environments such as the Hosting Environments that have been set up in Azure.
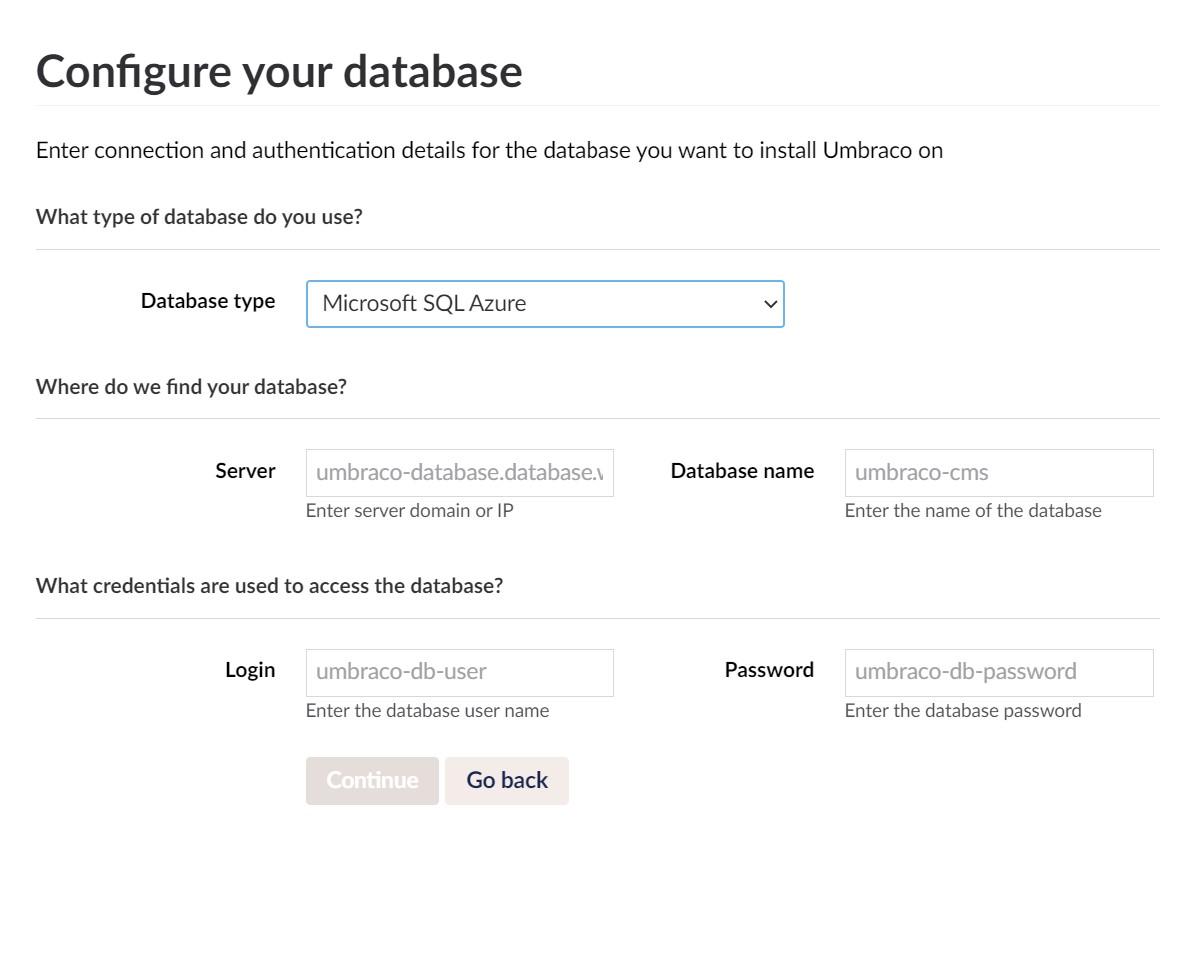
Step three
Select the database type you want to use; this is something that you will have configured in Azure already, we use an SQL Azure Database.
Step four
We choose not to install a starter website as we prefer to build up our websites.
Step five
This is the first page of your new Umbraco 8 Install. It is the main section where you will create pages for your website. On your first login, a tutorial will guide you through the first steps of creating an Umbraco Website. Before continuing through the tutorial, you should ensure that you have finished completing the setup of the project.
Extra NuGet Packages to install
Once you have completed the Umbraco Installation, there are some extra NuGet Packages that we recommend using. They are used when saving, rendering and uploading files to/from the Azure Storage. You will then have to configure each of these new NuGet Packages with the details you saved from previously, when setting up the services in Azure.
You can find the NuGet Package manager by going to ‘Project’ and selecting ‘Manage NuGet Packages…’ or right click on project and select Manage NuGet Packages.
Image Processor for Azure Blob Cache - Web.Plugins.AzureBlobCache
You can find this by searching for ’ImageProcessor’
It provides an image service that allows caching of images within AzureBlob Storage to serve via Umbraco.
Umbraco File System Provider - Azure.Media
There is a similarly named package without ‘.Media’ at the end, this is not the package you want, ensure that the one you select finishes with ‘.Media’
You can find this by searching for ‘UmbracoFile’
This is used to offload files stored in the Media section of Umbraco to Azure
Config Changes
There are several bits of code that need changing or adding in, to connect the visual studio project with the services created in Azure and the Umbraco Installation. This includes the extra NuGet packages that have been added.
- You must ensure that the folder title ‘App_Plugins’ is included in the source control as the contents of this folder are needed for the website to render correctly. To do this right click on the folder and select ‘Add files to source control’

Step Six SMTP Emails
You must configure the SMTP settings; these are the details and login information to enable you to send emails generated by the website, examples of a component that would need these configurations are a contact form or a sign-up form.
<smtp deliveryMethod="Network" from="">
<network host="" enableSsl="true" userName="" password="" port="" />
</smtp>
Step Seven Storage Account Details
The Storage Account Details in web.config
This is the details that you made note of previously when setting up the Storage Account in Microsoft Azure. You will need to input the endpoint locations, as well as the account name and account key.
Web config file in the ‘Media’ Folder
Static file Handler – You should add the new location of the Static File Handler - this goes in the web.config of the main project
<add key="AzureBlobFileSystem.ContainerName:media" value="media" />
<add key="AzureBlobFileSystem.RootUrl:media" value="https://websiteName.blob.core.windows.net/" />
<add key="AzureBlobFileSystem.ConnectionString:media" value="DefaultEndpointsProtocol=;AccountName=;AccountKey=" />
<add key="AzureBlobFileSystem.MaxDays:media" value="365" />
<add key="AzureBlobFileSystem.UseDefaultRoute:media" value="true" />
<add key="AzureBlobFileSystem.UsePrivateContainer:media" value="false" />
Web config file:
<add name="StaticFileHandler" path="*" verb="*" preCondition="integratedMode" type="System.Web.StaticFileHandler"/>
<add name="StaticFile" path="*" verb="*" modules="StaticFileModule,DefaultDocumentModule,DirectoryListingModule" resourceType="Either" requireAccess="Read"/>
Static File Handler:
<location path="media">
<system.webServer>
<handlers>
<remove name="StaticFileHandler" />
<add name="StaticFileHandler" path="*" verb="*" preCondition="integratedMode" type="System.Web.StaticFileHandler" />
</handlers>
</system.webServer>
</location>
Step Eight Image Processor Config
The following two changes are needed if you have installed the Image Processor NuGet Package recommended above. These changes are both to ensure that the correct storage account and database are used when retrieving and uploading new media or files.
The first is in config > ImageProcessor > cache.config
You should add the information about the current cache.
You should add the cache information, including the account information and the cachedCDNRoot endpoint.
The second is in config > ImageProcessor > security.config
You should add the two services listed below, ensuring that the account name and key are correct.
You should also ensure that the different hosting environment endpoints are correct and added to the whitelist.
First Part:
<caching currentCache="AzureBlobCache">
And
<cache name="AzureBlobCache" type="ImageProcessor.Web.Plugins.AzureBlobCache.AzureBlobCache, ImageProcessor.Web.Plugins.AzureBlobCache" maxDays="365">
<settings>
<setting key="CachedStorageAccount" value="DefaultEndpointsProtocol=;AccountName=;AccountKey=" />
<setting key="CachedBlobContainer" value="cache" />
<setting key="UseCachedContainerInUrl" value="true" />
<setting key="CachedCDNRoot" value="https://websiteName.blob.core.windows.net" />
<setting key="CachedCDNTimeout" value="1000" />
<setting key="SourceStorageAccount" value="" />
<setting key="SourceBlobContainer" value="" />
<setting key="StreamCachedImage" value="false" />
</settings>
</cache>
Second Part:
<service name="AzureImageService" type="ImageProcessor.Web.Plugins.AzureBlobCache.AzureImageService, ImageProcessor.Web.Plugins.AzureBlobCache">
<settings>
<setting key="StorageAccount" value="DefaultEndpointsProtocol=;AccountName=;AccountKey=" />
<setting key="Container" value="media" />
<setting key="AccessType" value="Blob" />
</settings>
</service>
<service prefix="media/" name="CloudImageService" type="ImageProcessor.Web.Services.CloudImageService, ImageProcessor.Web">
<settings>
<setting key="Container" value="media" />
<setting key="MaxBytes" value="8194304" />
<setting key="Timeout" value="30000" />
<setting key="Host" value="https://websiteName.blob.core.windows.net/" />
</settings>
<whitelist>
<add url="http://localhost:XXXXX"/>
<add url="http://prd-websiteName-web.azurewebsites.net"/>
<add url="https://prd-websiteName-web.azurewebsites.net"/>
<add url="http://www.websiteName.co.uk"/>
<add url="https://www.websiteName.co.uk"/>
</whitelist>
</service>
<service name="LocalFileImageService" type="ImageProcessor.Web.Services.LocalFileImageService, ImageProcessor.Web" />
Install Completed
This completes our step through guide of beginning an Umbraco 8 project using services in Microsoft Azure. To complete this setup, you should have created an App Service or two in Azure to act as Hosting Environments, a Blob storage Account which stores the media files from your website and a SQL database for your website has been add to the company’s Elastic Pool.
You will have added the Umbraco CMS NuGet package to your Visual Studio Project and Completed the custom installation process, linking the resources in Azure to the Umbraco backend. You are now ready to start adding components to the website, to do this you head over to the settings tab and follow the instructions there.


